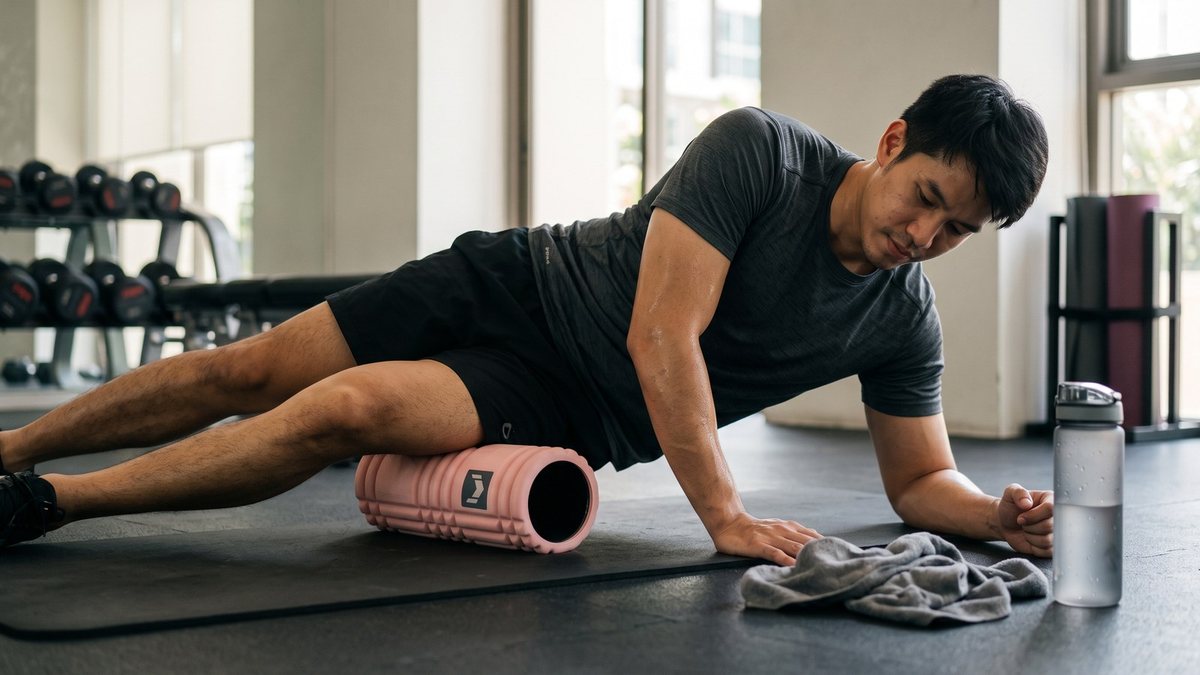
To use a foam roller after lifting, place it under the muscle you just trained and roll slowly, about 30–60 seconds per area, with only as much pressure as lets you keep breathing normally. A few minutes of this helps you relax and leaves muscles feeling less tight after a hard session.
Below: a step-by-step routine for quads, hamstrings, glutes, calves, upper back and lats, a note on the IT band area, and common beginner mistakes.
Before or after training?
Both work, but the goal is different.
- Before: keep it short, 20–30 seconds per area, focusing on what you are about to train. Follow it with light warm-up sets.
- After: slow down and spend 30–60 seconds per area, around 5–10 minutes in total, as part of your cool-down.
- Rest days: a light roll before bed is fine.
How long and how hard
- Speed: about 2–3 cm per second, far slower than most people roll. Fast rolling makes muscles tense up.
- Time: 30–60 seconds per area. If you find a tight spot, pause on it for 10–20 seconds and breathe out slowly before moving on.
- Pressure: on a 1–10 scale, aim for 5–7. Firm, but you can still breathe and stay relaxed. Holding your breath or grimacing means it is too much.
- Adjusting: take weight onto your hands or the other leg to make it lighter; stack one leg on top of the other to make it heavier.
Some tightness or a dull ache while rolling is normal. Sharp, shooting or radiating pain, numbness, or pain that lingers afterwards is not. Stop rolling that area, rest, and see a physiotherapist or doctor.
Step-by-step foam rolling after lifting
Use a mat and roll only what you trained that day.
1. Quads
- Get into a forearm plank with the roller under the front of your thighs.
- Use your arms to move yourself forward and back, rolling from just below the hip to a hand's width above the knee.
- Tilt slightly to reach the inner and outer quad. Do one leg at a time for more pressure.
Mistake: rolling over the kneecap or letting the lower back sag.
2. Hamstrings
- Sit with the roller under the back of your thighs, hands on the floor behind you.
- Lift your hips and roll from just below the glutes to just above the back of the knee.
- Turn your toes in and out to hit both sides. Cross one leg over the other for more pressure.
Mistake: rolling into the back of the knee, where there is no muscle to work on.
3. Glutes
- Sit on the roller with your hands behind you.
- Cross your right ankle over your left knee in a figure-4 and lean onto the right glute.
- Make short rolls up, down and side to side. Pause on tight spots, then switch sides.
Mistake: drifting up onto the tailbone and lower spine. Stay on the meaty part of the glute.
4. Calves
- Sit with legs straight, roller under your calves, hands behind you, hips lifted.
- Roll from just above the ankle to just below the knee.
- Rotate the leg in and out; stack your legs for more weight.
Mistake: pressing hard on the Achilles tendon and ankle. Go light there or skip it.
5. Upper back
- Lie on your back with the roller across your body under your shoulder blades, knees bent, feet flat.
- Cross your arms over your chest (do not pull on your head) and lift your hips slightly.
- Push with your legs to roll slowly over the shoulder-blade area. Lean a little to one side so the pressure goes onto the muscles beside the spine rather than the spine itself.
Mistake: rolling up onto the neck or down into the lower back. The shoulder-blade area is enough.
6. Lats
- Lie on your side with the roller just under your armpit, bottom arm reaching overhead.
- Bend your top leg and plant that foot in front of you to take some weight.
- Make short rolls from the armpit to about mid-ribcage, rotating your torso slightly to find the tight angle.
Mistake: rolling down to the waist and lower ribs, where there is little muscle.
7. Outer thigh (IT band area): go easy
This area is dense and often very uncomfortable, and more pressure is not better.
- Lie on your side with the roller under your outer thigh, top foot planted in front to carry most of your weight.
- Roll lightly over the middle of the thigh only, away from the knee and the hip bone.
- If it is very painful, roll your quads and glutes instead, the muscles around this area.
Common foam rolling mistakes
- Rolling the lower back. Nothing supports it there and the spine arches. Roll glutes and thighs instead.
- Rolling too fast. Halve your speed.
- Rolling over joints or bone. Knees, ankles, the side of the hip, the spine and the neck are off-limits. Stay on muscle.
- Parking on one spot for minutes. 10–20 seconds on a tight spot is plenty.
- Holding your breath. If you are bracing your whole body, the pressure is too high.
- Using it instead of rest. Sleep, food and a proper warm-up still matter more.
Which roller to choose
| Model | Key spec | Best for |
|---|---|---|
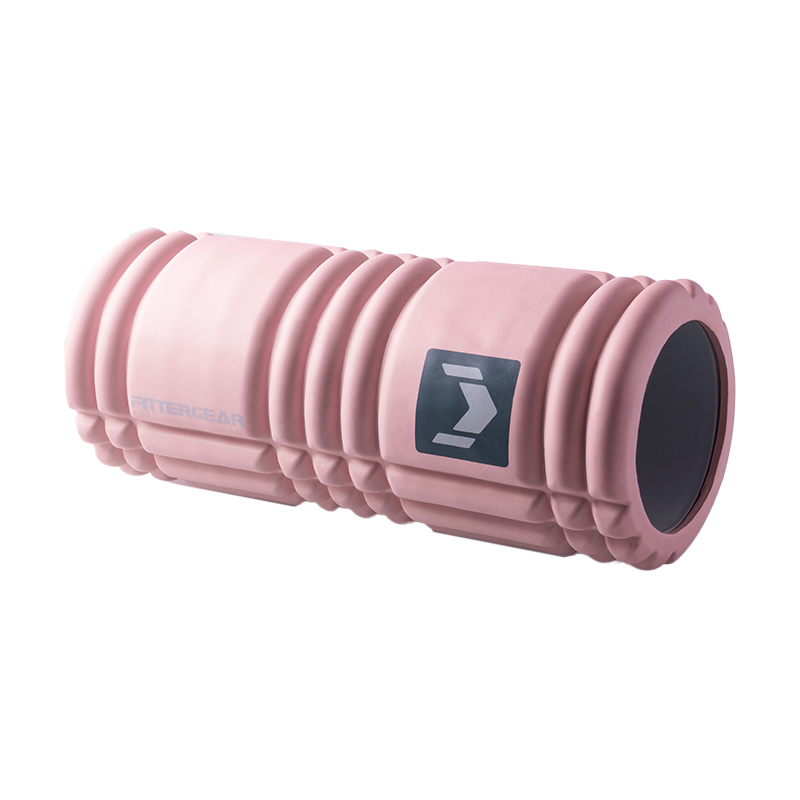
| Fittergear Foam Roller | Medium-density foam, 80% EVA / 20% PP, 15 cm diameter | Beginners and lifters; quads, hamstrings, glutes, calves and lats, before and after training |
| Stripe Hollow Yoga Roller | Hollow core, striped surface, 6 colours | Yoga practice and relaxing muscle massage at home |
If you are new to rolling and mainly lift, the Fittergear Foam Roller is the straightforward pick. Its medium density is beginner-friendly yet firm enough for a thorough roll, before or after training. Black, yellow, green or pink. The Stripe Hollow Yoga Roller is a hollow, striped roller that suits people who also do yoga and want a roller for muscle massage at home.
FAQ
Can I foam roll every day?
Yes, at moderate pressure and for a few minutes at a time. If an area still feels sore the next day, you pressed too hard; ease off.
Is it supposed to hurt?
Tightness or a tolerable ache is normal. Sharp pain, numbness or pain that lasts for days is not. Stop rolling there, rest, and see a physiotherapist or doctor rather than trying to roll through it.
Is a massage roller the same as a foam roller?
Usually, yes. The real differences are material, firmness and construction, such as solid foam versus a hollow core.